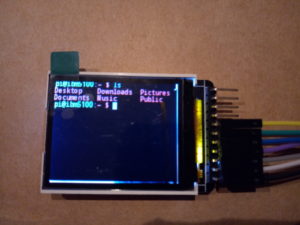
Installation d'un écran LD 1.8" sur un Raspberry Zero
Matériels :
- Raspberry Zero WH : https://www.gotronic.fr/art-carte-raspberry-pi-zero-wh-27670.htm
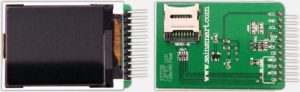
- Ecran 1,8'' RB-TFT1.8 : https://www.gotronic.fr/art-ecran-1-8-rb-tft1-8-26567.htm Site officiel : https://joy-it.net/en/products/RB-TFT1.8 Autre site : https://www.tweaking4all.com/hardware/arduino/sainsmart-arduino-color-display/
1/ Branchement entre l'écran et le Raspberry Pi.
Documentation : https://joy-it.net/files/files/Produkte/RB-TFT1.8/RB-TFT1.8-Manual.pdf Table de correspondance :
Raspberry Zero            Ecran
PIN 1 (+3.3V)             +5V
PIN 6 (GND)               GND
PIN 23 (SCLK)             SCL
PIN 19 (MOSI)             SDA
PIN 18 (GPIO 24)          RS/DC
PIN 22 (GPIO 25)          RES
PIN 24 (CE0)              CS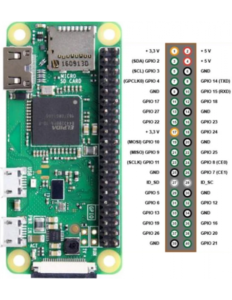
2/ Distribution de travail.
Raspbian : 2017-07-05-raspbian-jessie.zip https://downloads.raspberrypi.org/raspbian/images/raspbian-2017-07-05/
pi@raspberrypi:~ $ uname -a
Linux raspberrypi 4.9.35+ #1014 Fri Jun 30 14:34:49 BST 2017 armv6l GNU/Linux
Les dernières versions de Raspberry OS sont en noyau 5.0 et n'inclut pas le module "fbtft".
3/ Reconnaissance de l'écran LCD : Configuration des fichiers.
Ouvrir :
/boot/config.txtChercher :
#dtparam=spi=onDécommenter :
dtparam=spi=onOuvrir :
/boot/cmdline.txtAjouter à la fin :
fbcon=map:10Ouvrir :
/usr/share/X11/xorg.conf.d/99-fbturbo.confChercher :
Option "fbdev" "/dev/fb0"Remplacer par :
Option "fbdev" "/dev/fb1"Créer :
/etc/modules-load.d/fbtft.confAjouter :
spi-bcm2835
fbtft_device
Créer :
/etc/modprobe.d/fbtft.confAjouter :
options fbtft_device name=sainsmart18 rotate=904/ Configuration du Terminal LXDE.
Permet d'afficher le terminal, sans décoration, en haut à gauche du bureau. Ouvrir :
~/.config/lxsession/LXDE-pi/autostartAjouter à la fin :
@lxterminalOuvrir :
~/.config/openbox/lxde-pi-rc.xmlChercher :
< applications>Ajouter après :
  < application class="Lxterminal" name="lxterminal">
  < position force="yes">
    < x>0< /x>
    < y>0< /y>
    < decor>no< /decor>
  < /position>
  < /application>
5/ Montage.